In this article, we will show you how to quickly and efficiently add a button to your website in the SiteJet Builder editor.
Buttons are important elements of a website that allow you to redirect the user to a specific location within the site or to an external page. To add such an element in the Sitejet Builder editor, click the Elements icon in the left sidebar, select Button, and drag it to the desired location on the page.
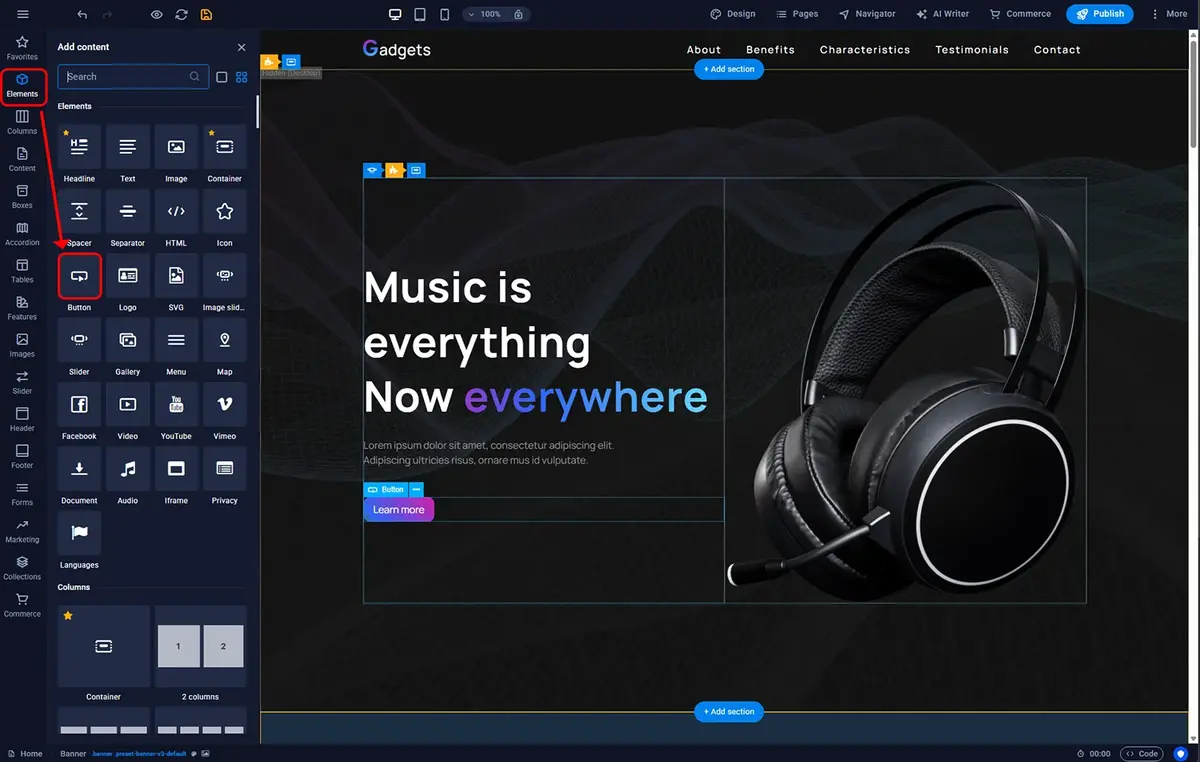
Sitejet Builder - adding a button
Once the button is on the page, you can double-click it to access the settings. Here you can define the appearance of your button. The options in the first column relate to the button's appearance on the page, while those in the second column concern its appearance when the cursor hovers over it.
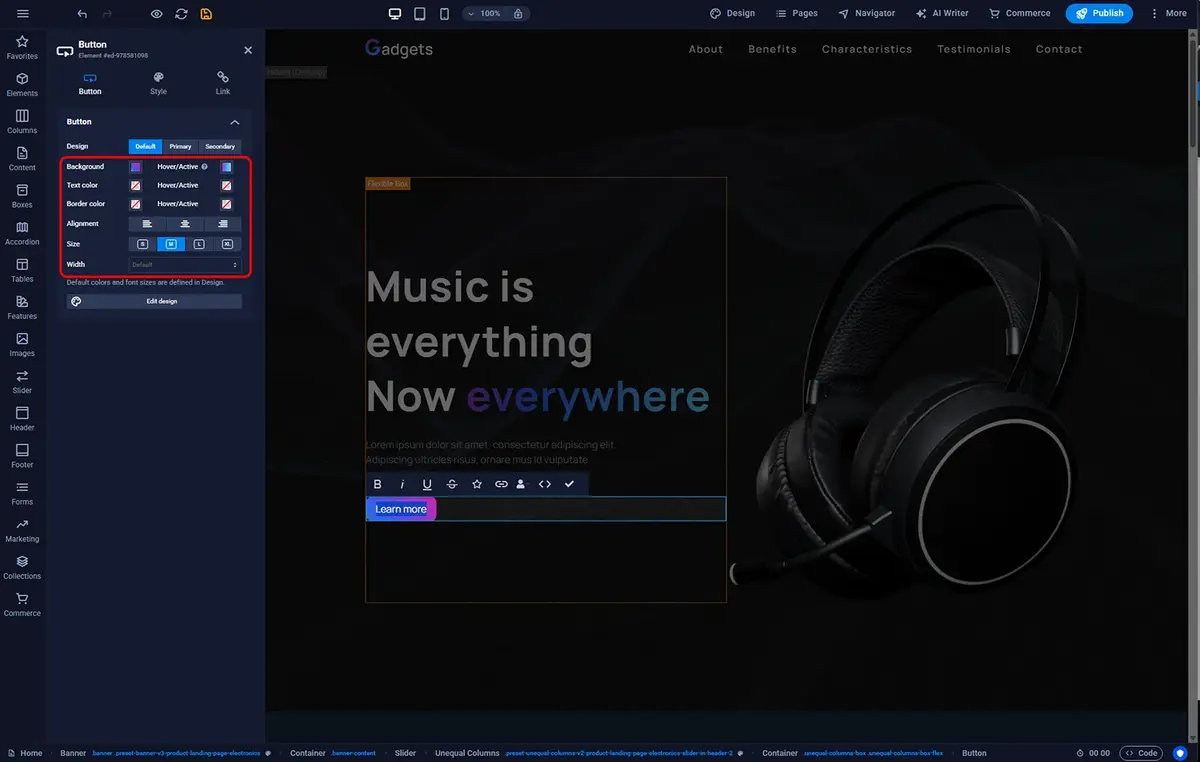
Sitejet Builder - button appearance
The next step in adding a button is defining its content. To do this, simply double-click the button text in the main editor window. This will allow you to enter your own text and also access the font settings.

Sitejet Builder - button-content
The final thing to configure is the link that the button will direct to. To set this, double-click the button element in the main editor window, then in the settings panel on the left sidebar, go to the Link tab. Here you can choose whether the button will link to another element on your page, an external resource, or to an email client to compose a message.
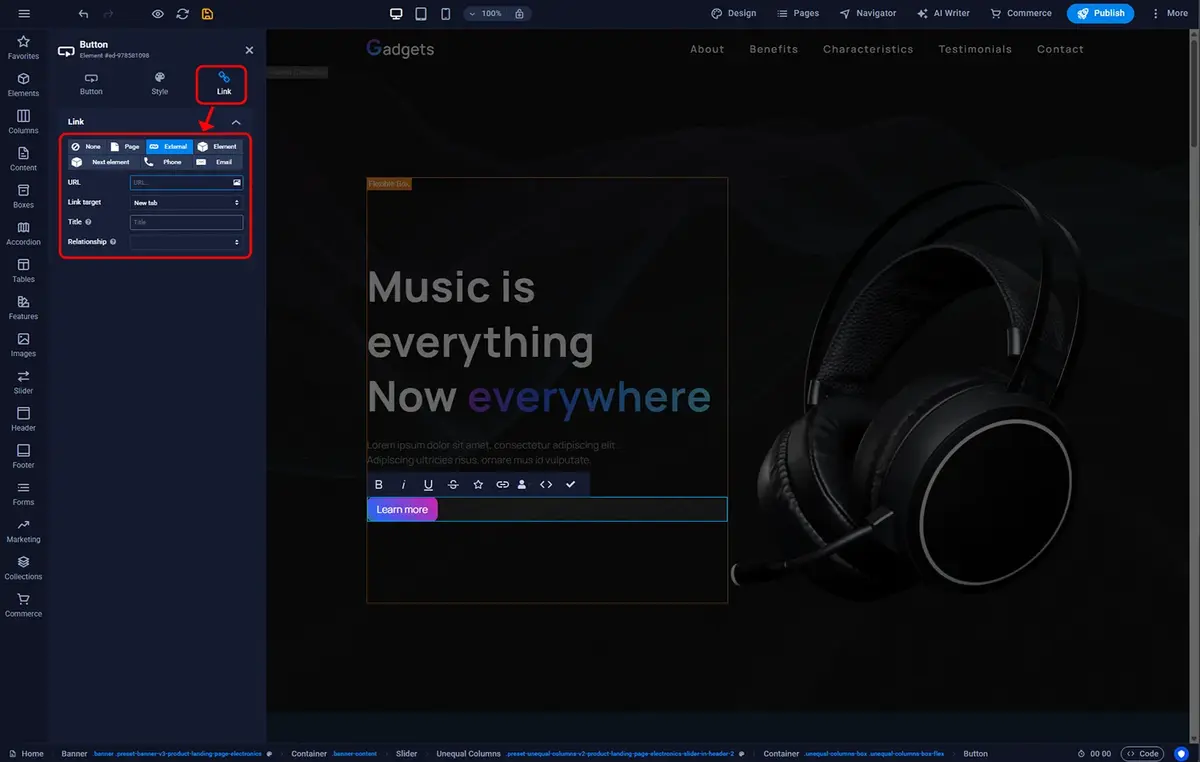
Sitejet Builder - button link
© 2026 Smartx Technologies LTD. All rights reserved.